Installing a liner can be confusing. If you’re planning on installing the liner yourself you can save a tonne of money, but do bear in mind that hiring a professional can ensure its longevity.
The instructions listed below are tailored for the installation of an inground vinyl pool liner using the hung attachment method.
Remove the Previous Liner If you are replacing an old swimming pool liner, naturally, you will need to remove the old liner first.
Cut the liner into sections, this will help to ease the removal process. You can cut the liner into 2-4 pieces and 6” below the bead track to first remove the bulk of the liner, and then you can return to remove the remaining liner.
Once the previous liner has been removed, you will then need to inspect the pool floor and wall for anything that might damage the new liner.
Prepare The Pool Site For the New Liner
Before you jump on to installing a brand new liner, you should wait for at least 3-5 dry days.
Store the new liner in a warm environment for 2-3 days before fitting, this will ensure the liner is as pliable as possible.
To prepare the site, you will need to first drain the pool completely.
Closely examine the interior of the pool. Remove anything that might damage the liner, such as stones, gravel, and protruding pieces of cement.
Prepare the liner underlay if necessary. A liner underlay will provide some insulation and protection against any abrasions between the liner and the floor and wall.
If installing an underlay, cut the underlay to the size and shape required, using something similar to a Stanley knife.
Butt the joins together so they do not overlap and tape the seams with specialized liner underlay tape. Use caution when choosing the tape; color may affect the liner over time so it is important to only use specialized tape.
Ensure that the central plumbing of the swimming pool is turned off.
Measure the pool liner to ensure that it is of the correct specifications for your pool. It’s okay for the liner to be slightly smaller than the dimensions of the pool, as this will allow it to be stretched during the installation so it will perfectly fit your pool, crease-free.
Remove the swimming pool faceplates, such as the skimmers, main drain, returns, and step gaskets.
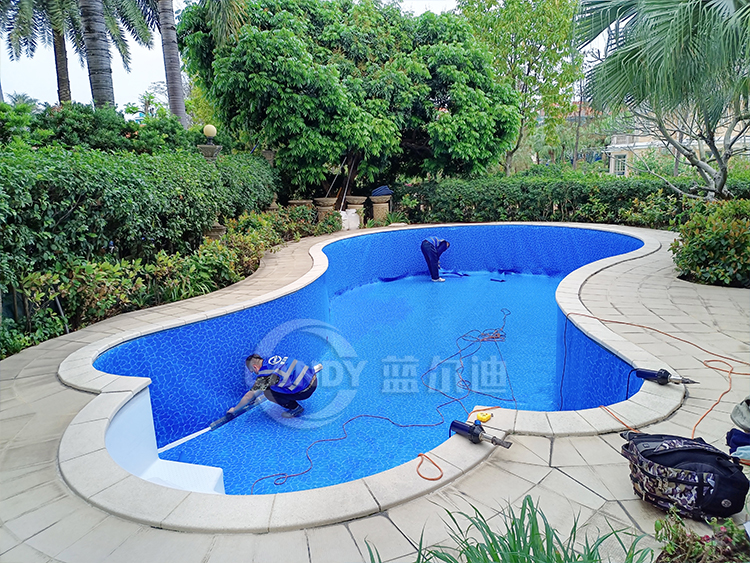
Install the New Swimming Pool Liner Your pool liner must be completely installed before it can be filled back up with water, so it’s important for all of these steps to be completed before continuing to use your pool.
Firstly, you will want to ensure that anyone who is assisting you to fit the liner will only enter the pool barefoot to avoid any punctures.
Remove the liner from its warm environment and place it on the floor of the shallow end.
A label signifying the position of the deep end will be attached to the liner. Ensure that this label is facing the deep end.
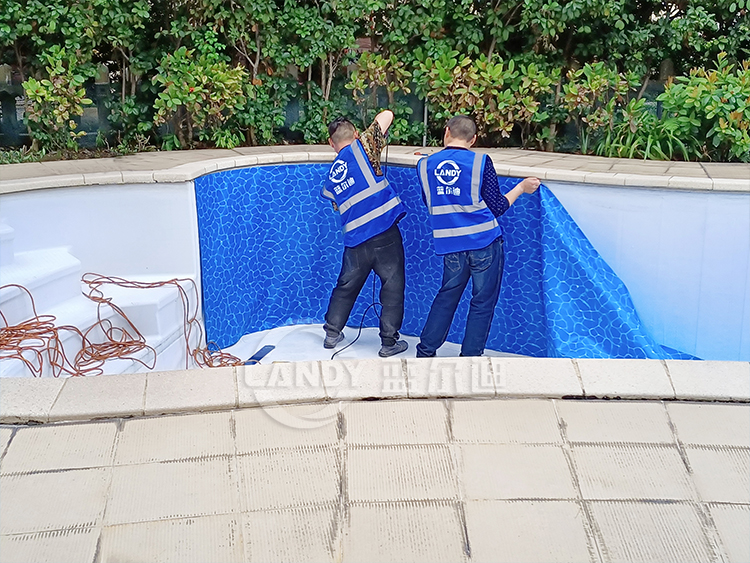
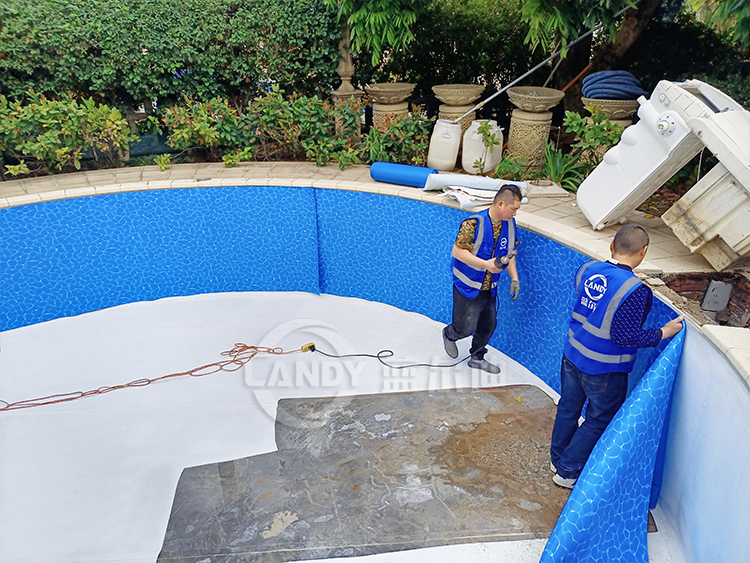
Unroll and unfold the liner across the length of the pool. The liner will have special beading welding along the top edge – this will clip into the aperture of the liner lock, which is already fixed to the top of the pool.
Ensure that the corners of the liner are in the correct floor level positions of each pool corner.
Starting at one of the corners in the shallow end, push the liner into the corner with your foot. While maintaining the pressure, lift the wall of the liner and feed the beading into the top of the liner lock, until it is held into position.
Using the above method, work your way around the pool, locking the beading track as you go. Ensure that the four corners are situated correctly, sliding the liner along to ensure that this is possible.
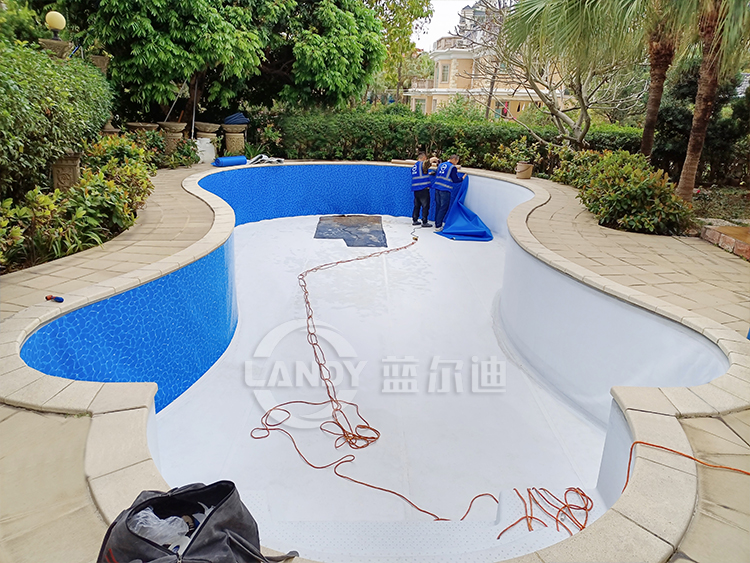
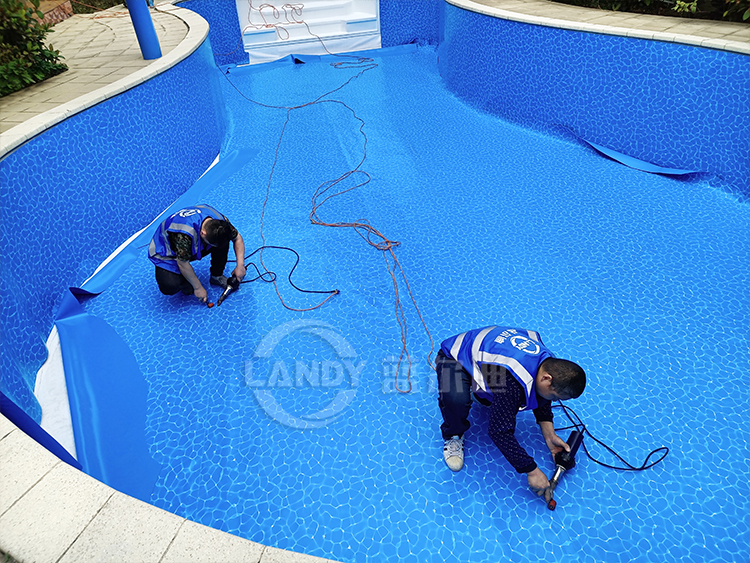
Secure the Liner The most effective way to position and secure the liner is to use an industrial wet and dry vacuum. You can hire these from a local hire shop. The vacuum will draw the liner down the back of the walls to ensure an exact fit.
Use masking tape to seal the open ends of the pipes connected to the skimmers, inlets, main drain, and vac point.
Seal the joint between the rear edge of the liner lock and the top of the wall with a neat cement mix; this will reduce the possibility of air being drawn in between the liner lock and wall.
Approximately 450mm (18”) from one of the deep end corners, lift a small length of the liner beading out of the liner lock track and carefully position the vacuum cleaner hose down behind the liner. Push the hose down so it is within 6” of the base of the wall.
Seal the gap surrounding the swimming pool hose with either tape or wet towels and turn the vacuum cleaner on.
Once the vacuum is on, the liner will be sucked back into the walls and floor. At this point, you will want to ensure that the corners fit correctly and that the floor seams align with the base of the wall.
If the liner has not been sucked fully, there may be some tension at the base of the walls. Provided that the tension is equal across the pool, this will correct itself when the pool is filled.
If there are any creases from the floor seam to the top of the wall, turn the vacuum off and slide the liner along the liner lock to remove them.
Switch the vacuum back on and check that the liner fits properly.
Before proceeding to the next steps, you should ensure that you are completely satisfied with the fit of the liner.
Once you are completely satisfied with the liner, fill the deep end base of the pool with 75mm (3”) of water.
The main drain fitting will then need to be cut out.
Cut Out The Main Drain
Puncture each of the screw holes in the main drain faceplates with a bradawl. The outline of the plates will be easily visible through the liner.
Locate the flange plates and gaskets on top of the liner and align the screw holes.
Fit the screws carefully. Take care to work on pairs of screws that are diagonally opposite one another, this allows the plates to be evenly screwed down.
Tighten all screws.
Once secure, carefully cut out the liner that is held in the center of the flange plates.
Continue to fill the pool. Switch off the vacuum cleaner when the pool has been filled to a level of 150mm (6”) above the shallow end floor.
Remove the vacuum from behind the liner and secure the beading into the liner lock.
Cut out the Return Inlet Fittings Before you begin cutting out the return inlet fitting, the water level must be immediately below the fitting. If the liner is cut too soon, stretching may occur, which will create creases around the fitting.
Locate the screw holes and pierce them with the bradawl.
Align the flange plate with the gasket and tighten the screws. Ensure that you continue to work in diagonally opposite pairs to evenly secure the fitting.
Once secure, carefully cut out the inner circle of the liner.
Screw the eyeball housing assembly into position.
Cut out The Surface Skimmer Fitting Before cutting out the surface skimmer fitting, ensure that the water level is directly below the skimmer extension throat to prevent any stretching from occurring around the fitting.
Locate the screw holes and pierce them with a bradawl.
Align the flange plate with the gasket and tighten the screws. Continue tightening the diagonally opposite pairs to evenly secure the fitting.
Once secure, carefully cut out the inner rectangle of the liner.
Snap the cover plate into position over the flange plate.
Finish filling the pool until the water is halfway up the skimmer’s mouth – this represents the normal water level.
For commissioning purposes, top up the pool with an extra 1” of water.
We hope this article has provided you with enough information to install a swimming pool liner. If you require any further assistance, be sure to contact a member of our team, or you can browse through our blog which is filled with loads of advice about maintaining your swimming pool and spa!